A $1,200 phone in your pocket can shoot 4K video with optical stabilization, HDR processing, and cinematic color profiles. That same phone can upload the finished product to Instagram, TikTok, YouTube, and your MLS listing within minutes. And yet, most real estate agents have never filmed a single property tour video. Not one.
The usual excuses: "I do not have the right equipment." You do. It is in your hand right now. "I am not a videographer." You do not need to be. "It will look unprofessional." Only if you ignore the simple techniques covered in this guide. "I do not have time to edit." We will cover that too, including the option that eliminates filming and editing entirely.
Here is the truth that the videography industry would prefer you not know: a well-executed phone property tour looks better than 80% of the "professional" real estate videos out there. I have watched hundreds of agent-commissioned videos that were shot by "professionals" with shaky handheld footage, blown-out windows, random pacing, and music that sounds like it was composed for an elevator in 1997. Your phone, combined with the techniques in this guide, can beat that. Easily.
This guide covers everything from phone settings and stabilization to walking technique, lighting, and editing. We also cover the alternative approach: skipping filming entirely and using AI to generate cinematic video from your listing photos. Both methods work. Which one is right for you depends on your time, your listing volume, and honestly, whether you enjoy the filming process or find it tedious.
For a broader look at real estate photography and how photo quality affects video output, see our real estate photography guide.
Before You Film: Phone Settings That Actually Matter
Most agents pull out their phone, tap record, and start walking. That is like showing up to a listing presentation without comps. Technically possible, but you are sabotaging yourself. Spend 60 seconds on these settings before you film a single frame.
Resolution and Frame Rate
Set your camera to 4K at 30fps. Not 1080p (you are leaving quality on the table). Not 60fps (higher frame rate creates a "soap opera effect" that looks unnatural for real estate). Not 24fps (too cinematic, can look stuttery on phone playback). 4K at 30fps is the sweet spot that balances quality, file size, and natural motion.
iPhone: Settings > Camera > Record Video > 4K at 30fps
Samsung: Camera app > Settings > Video Resolution > UHD (3840x2160) 30fps
Pixel: Camera app > Settings > Video Resolution > 4K (30fps)
Lock Your Exposure
This is the single most important setting for property tours, and almost nobody does it. Here is the problem: as you walk from a bright kitchen to a dark hallway, your phone's auto-exposure frantically adjusts brightness. The result is a distracting pulse of light-dark-light-dark that screams "amateur phone video."
The fix: before you start filming, point your phone at a mid-tone surface (a wall that is not directly lit by a window and not in deep shadow). Tap and hold until the exposure locks (iPhone shows "AE/AF LOCK" at the top of the screen). Now the exposure stays consistent as you move between rooms.
Will you lose some detail in very bright windows and very dark corners? Yes. Is that tradeoff worth it? Absolutely. Consistent exposure looks professional. Hunting exposure looks like your phone is having a seizure.
Grid Lines
Turn on the rule-of-thirds grid. This overlay divides your frame into nine sections. Keep the horizon line aligned with the top or bottom grid line. Keep vertical elements (door frames, walls, columns) aligned with the vertical grid lines. This prevents the tilted, off-kilter framing that makes phone video look casual instead of intentional.
Other Settings
- Turn off HDR video: It looks great on the phone screen but creates compatibility issues with editing apps and can result in washed-out colors when uploaded to social media.
- Turn off the flash: Camera flash is useless for video in a room. It creates a harsh, unflattering front-light that makes every surface look flat.
- Turn on airplane mode: Nothing ruins a perfect take like a spam call popping up mid-tour. Airplane mode prevents calls, texts, and notification sounds from interrupting your filming.
- Clean your lens: I know this sounds ridiculous, but wipe the lens with your shirt before every tour. Fingerprints on the lens are the single most common cause of hazy, low-contrast phone footage. Your phone lives in your pocket. It gets dirty. Clean it. Takes three seconds. Pays off immediately.
The Equipment Question (Spend Less Than You Think)
Good news: you probably already own everything you need. Your phone is the camera. Your body is the stabilizer. Natural light through windows is your lighting setup. That said, a few inexpensive accessories can meaningfully improve your results.
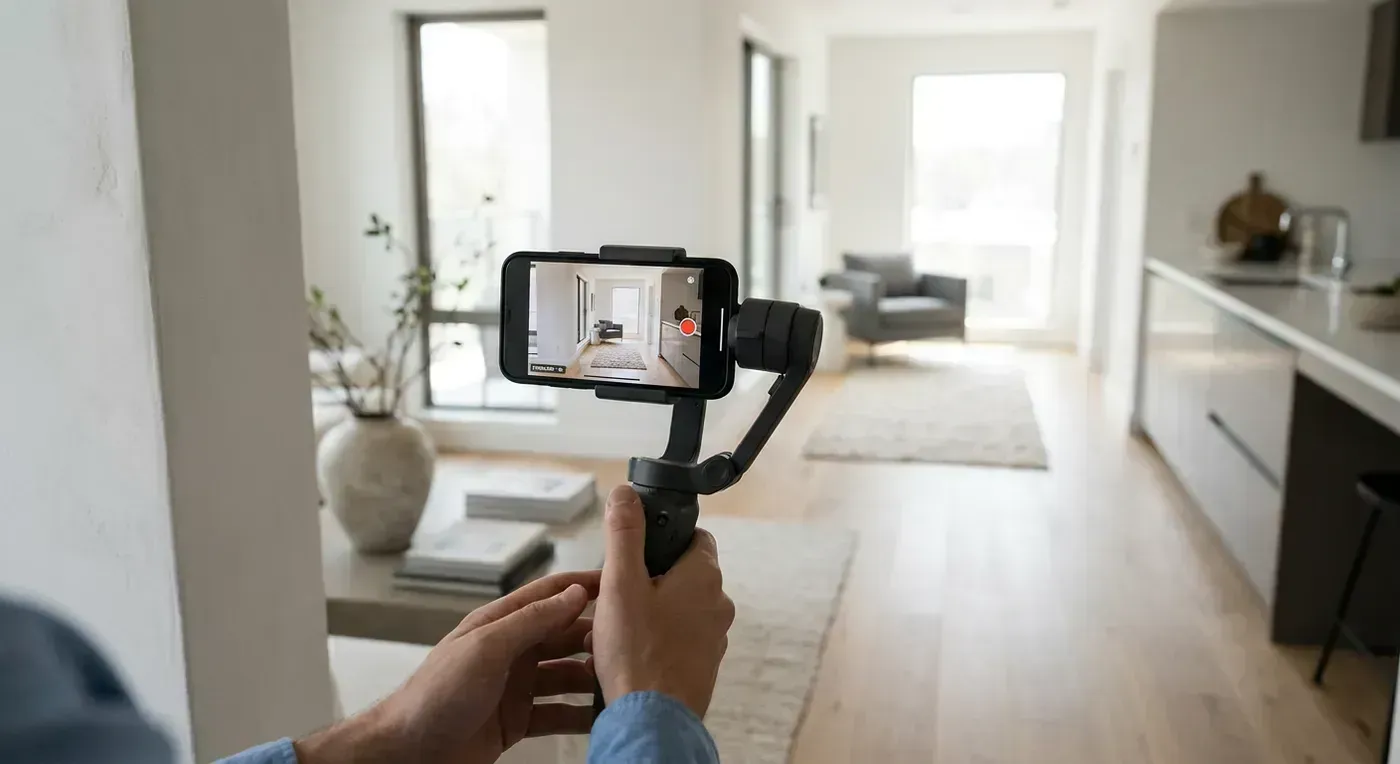
Gimbal Stabilizer ($80 to $150): Recommended But Not Required
A gimbal is a motorized handle that keeps your phone perfectly level as you walk. It eliminates the micro-jitters and bobbing that phone stabilization cannot fully correct. The difference between footage shot handheld and footage shot on a gimbal is immediately obvious. Handheld footage says "phone video." Gimbal footage says "somebody who knows what they are doing."
Top picks for real estate agents:
- DJI OM 7: Best overall. Excellent stabilization, magnetic phone mount (quick to attach/detach between showings), gesture control, and a companion app with tracking features. $99 to $130.
- Insta360 Flow: Compact and foldable. Built-in selfie stick for elevated angles. Good stabilization. $99.
- Zhiyun Smooth 5S: Best for manual control. Physical joystick for precise camera movements. $89 to $120.
If a gimbal is not in the budget right now, you can get 80% of the stabilization benefit by holding your phone with both hands at chest height, keeping your elbows tucked against your body, and bending your knees slightly while walking. This turns your arms and legs into a biological stabilizer. It works surprisingly well, but it requires practice and deliberate, slow movement.
Wide-Angle Clip-On Lens ($15 to $30): Only If Your Phone Lacks Ultrawide
If your phone has an ultrawide lens (0.5x), use it for interiors. The wider field of view captures more of the room in each frame, which gives viewers a better sense of the space. Most phones released since 2021 include an ultrawide lens.
If your phone does not have one, a clip-on wide-angle lens attachment from Moment or similar brands adds that wider perspective. Cheap options ($10 to $15) work but add edge distortion. Mid-range options ($25 to $40) produce cleaner results. Skip the $5 no-name options from Amazon. They will make your footage look worse, not better.
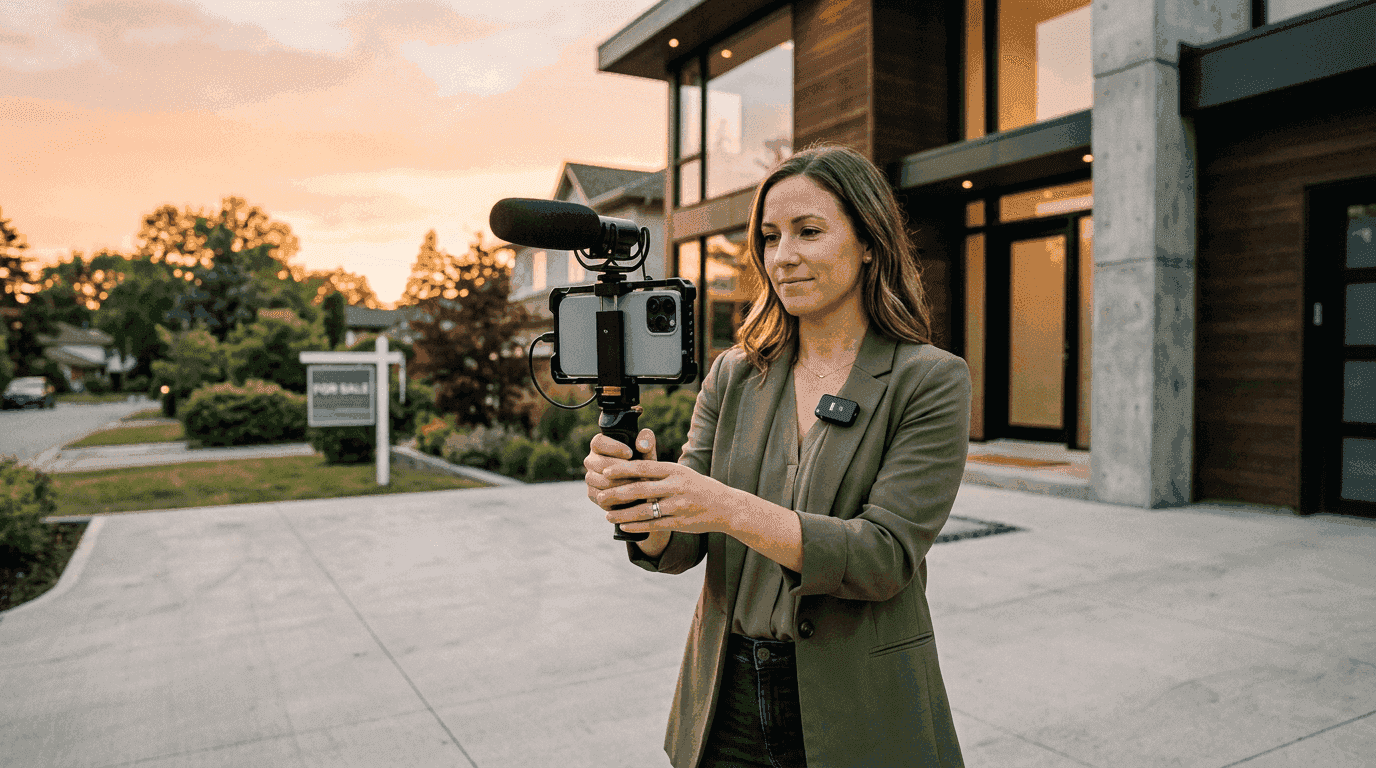
Wireless Microphone ($25 to $50): Only If You Narrate
If you plan to talk during your tours, your phone's built-in microphone will pick up your voice along with every echo, air conditioning hum, and outside traffic noise. A wireless lavalier (clip-on) mic dramatically improves audio quality.
The DJI Mic Mini ($50), Rode Wireless ME ($70), or budget options from MAYBESTA ($25) all plug directly into your phone's USB-C or Lightning port. Clip the mic to your collar and your voice will be clear and present, even in echoey empty rooms.
If you do not plan to narrate (and for social media distribution, you probably should not), skip the mic entirely. Music-backed tours with text overlays perform as well or better than narrated tours on Instagram and TikTok.
Small LED Panel ($30 to $50): For Dark Rooms
Basements, windowless bathrooms, and north-facing rooms on cloudy days can be too dark for good phone video, even with all the lights on. A small, battery-powered LED panel mounted on your gimbal or held by a friend fills in the shadows without the harshness of the phone's built-in flash.
The Neewer 660 RGB or Aputure MC are popular choices. Set the color temperature to match the room's existing lighting (warm/tungsten for rooms with yellow-toned bulbs, cool/daylight for rooms with white LED bulbs). Mismatched color temperatures create a distracting blue/orange clash that is hard to fix in editing.
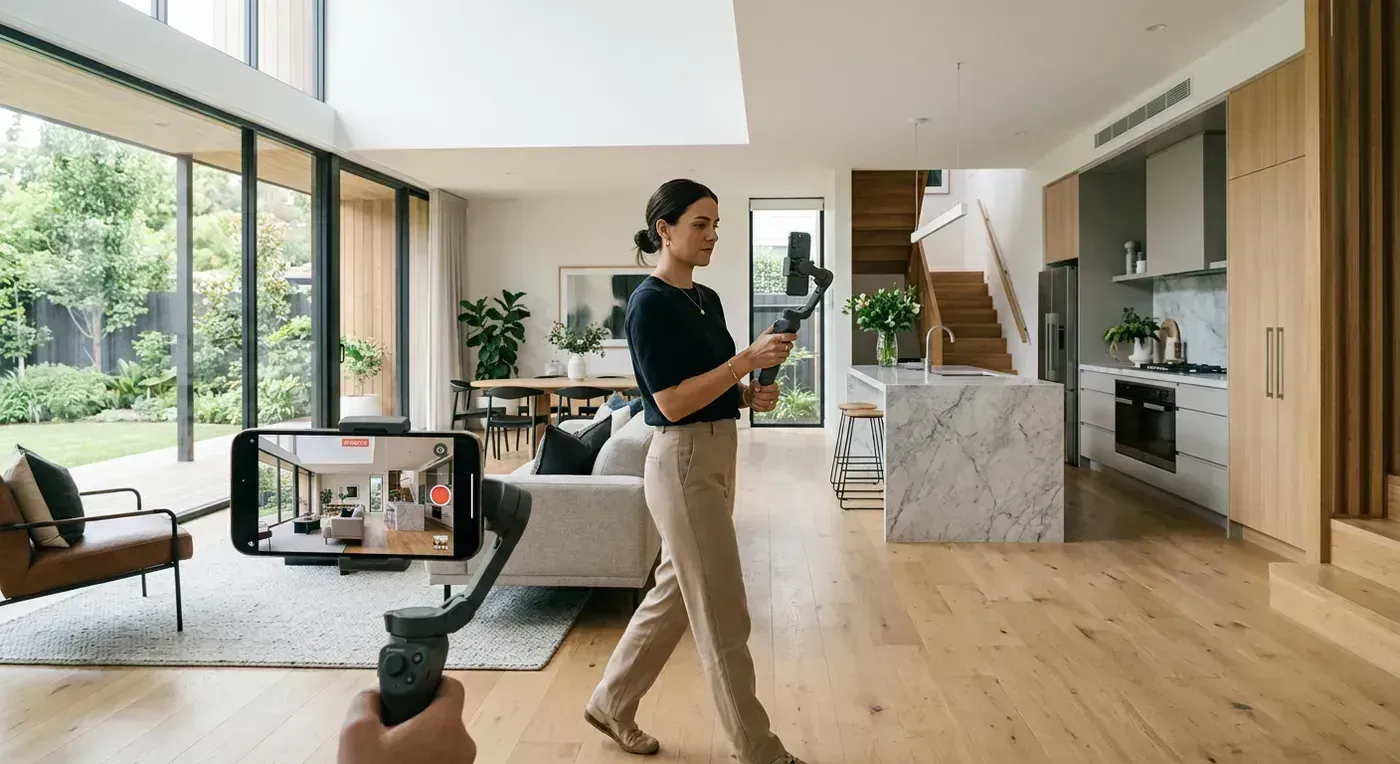
The Filming Technique: How to Walk Through a Property
This is where 90% of agents go wrong. They know how to hold a phone. They know how to walk. But combining the two into a smooth, watchable property tour is a skill that requires deliberate practice. Here is the technique, step by step.
Rule 1: Walk Half as Fast as You Think You Should
I cannot stress this enough. The most common mistake in phone property tours is moving too fast. What feels like a natural walking pace to you looks like a rushed sprint on video. Your viewer needs time to register each room, take in the details, and form an impression of the space.
Count "one-Mississippi" between each step. Seriously. It will feel painfully slow in person. On playback, it will look confident and professional. Fast movement communicates anxiety. Slow movement communicates control. Viewers trust the person who moves deliberately through a space.
Rule 2: Pause at Doorways
Every time you enter a new room, stop at the doorway for 2 to 3 seconds. Let the camera capture the full room from the threshold. Then slowly enter. This gives the viewer a "reveal" moment for each space and creates natural edit points if you need to cut the footage later.
The doorway pause is also the best moment to reframe your shot. Check the grid lines. Make sure the room's vertical lines (door frames, window frames) are straight. Adjust your phone angle if needed. Then continue.
Rule 3: Lead With the Ultrawide, Detail With the Standard
Start each room on the ultrawide lens (0.5x) to establish the space. If there is a feature worth highlighting (a waterfall island, a fireplace, custom tile work), switch to the standard lens (1x) and move closer to capture the detail. Then switch back to ultrawide for the next room.
This wide-to-tight-to-wide pattern mimics how professional videographers shoot, and it gives your viewer both the big picture and the details. A tour filmed entirely on ultrawide feels detached. A tour filmed entirely on standard feels claustrophobic. The combination feels intentional.
Rule 4: Move Horizontally, Not Vertically
Keep your phone at a consistent height (chest to chin level) and move through the space primarily with lateral and forward motion. Avoid tilting the camera up and down. Panning (horizontal rotation) is fine and looks natural. Tilting (vertical rotation) almost always looks amateurish on phone video because it accentuates any stabilization flaws.
The exception: if the property has dramatic ceiling height (vaulted ceilings, two-story great rooms), a slow upward tilt can be effective. Start at the floor or mid-wall level and slowly tilt up to reveal the full ceiling height. This works best on a gimbal. Handheld, the tilt tends to wobble.
Rule 5: Film the Route, Not Just the Rooms
Show the transitions between rooms. Walking through a hallway, turning a corner, opening a door. These connecting moments are what make a property tour feel like a walkthrough rather than a collection of disconnected room clips. A good property tour has narrative flow: front door to foyer, foyer to living room, living room to kitchen, kitchen to dining room. The viewer should feel like they are walking through the home, not teleporting between rooms.
Rule 6: Prepare the Property First
Before you press record:
- Turn on every light in the house. Every single one. Even the closet lights.
- Open all blinds and curtains (unless direct sun creates harsh beams across the floor).
- Close all toilet lids. (I should not have to say this, but after reviewing hundreds of tour videos, I absolutely do.)
- Remove personal items: family photos, mail, shoes by the door, pet bowls, medications on the counter.
- Run through the route once without filming. Note any tight spots, dark corners, or tripping hazards. Plan your path.
The Walkthrough Plan: Room by Room
Here is the filming order I recommend for a standard residential property. This sequence creates the most natural viewer experience.
- Exterior front (10 to 15 seconds): Start from the street. Walk toward the front door. This establishes the property's curb appeal and gives the viewer a sense of arrival.
- Entry/foyer (5 seconds): Quick pause at the door. Step inside. Let the viewer see the first impression of the interior.
- Main living area (10 to 15 seconds): Living room, family room, or great room. This is usually the largest open space. Move slowly. Let the room breathe.
- Kitchen (15 to 20 seconds): The most important room in the house for most buyers. Show the countertops, island (if any), appliances, and the view from the kitchen into adjacent spaces. Linger here. Buyers care about kitchens more than any other room.
- Dining area (5 to 8 seconds): Brief pass-through unless it is a standout feature.
- Primary suite (10 to 15 seconds): Show the bedroom and the ensuite bathroom. Walk-in closet if it is impressive.
- Additional bedrooms (5 seconds each): Quick doorway reveals. Do not spend 30 seconds in each secondary bedroom unless they have noteworthy features.
- Additional bathrooms (3 to 5 seconds each): Doorway shot is usually sufficient unless the bathroom is a selling point.
- Garage (3 to 5 seconds): If it is a selling point (large, finished, workshop space). Otherwise, skip it entirely.
- Backyard/outdoor living (10 to 15 seconds): Walk outside. Show the patio, pool, landscaping, view. End your tour here if the outdoor space is strong. A great closing shot is the house from the backyard at a distance.
Total filming time for this sequence: about 2 to 3 minutes of raw footage, which edits down to a 1.5 to 2.5 minute finished video. That is the ideal length for YouTube and MLS. For social media, you will cut it further to 15 to 30 seconds highlighting only the best 4 to 6 rooms.
Editing on Your Phone: Fast and Simple
You have the footage. Now you need to turn it into a finished, polished video. The good news: phone editing apps in 2026 are remarkably capable. The bad news: most agents spend way too long editing because they try to make every cut perfect. Aim for "professional and fast," not "Oscar-worthy and late."
Best Free Editing Apps
| App | Platform | Best For | Limitations |
|---|---|---|---|
| CapCut | iOS, Android | Quick edits, text overlays, trending effects | Watermark on some features |
| InShot | iOS, Android | Simple trimming, music, aspect ratio changes | Pro features require subscription |
| iMovie | iOS only | Clean interface, good stabilization | Limited text overlay options |
| Google Photos | iOS, Android | Basic trim and crop | Very limited editing tools |
The 10-Minute Edit Workflow
- Import and trim (2 minutes): Import your footage. Cut the beginning (before you started walking) and the end (after you stopped). Remove any sections where you stumbled, paused awkwardly, or knocked into a doorframe. No judgment. It happens to everyone.
- Add music (1 minute): Choose a track from the app's royalty-free library. Match the energy to the property. Lower the music volume so it is present but not overpowering.
- Add text overlays (3 minutes): Property address and price at the beginning. Room labels as you enter each space (optional but helpful). Your name and contact info at the end. Keep text clean and readable. White text with a subtle drop shadow works on most footage.
- Color correction (2 minutes): Most editing apps have one-tap filters or "auto-enhance" features. Use them sparingly. A slight increase in brightness and saturation usually improves phone footage without making it look over-processed. Avoid heavy filters that change the color of the walls. Buyers want to see what the rooms actually look like.
- Export (2 minutes): Export at the highest quality available. 4K if the app supports it. 1080p minimum. Save both a horizontal (16:9) version for MLS/YouTube and a vertical (9:16) version for Instagram/TikTok. Some apps let you change the aspect ratio and re-export without re-editing.
Total editing time: about 10 minutes. The result: a clean, professional listing tour with music, text overlays, and your branding. Is it as polished as a $800 videographer production? No. Is it 10x better than a raw, unedited phone clip? Absolutely. And it cost you nothing but time.
The Alternative: AI Video from Photos (No Filming Required)
Here is the section where I acknowledge the elephant in the room. You already have professional listing photos. Your photographer delivered them. They are sharp, well-lit, perfectly composed, and sitting in a Dropbox folder. Why would you film a shaky phone tour when you could turn those professional photos into a cinematic video automatically?
AI-powered video tools take your still photos, generate realistic camera motion for each one, sync transitions to music beats, add your branding, and render the final video in multiple formats. The output looks like a camera dollied through each room, but no camera ever moved. It was all generated from the photos.
Here is what that looks like:
Distribution: Where to Post Your Phone Tour
You filmed it. You edited it. Now get it in front of buyers. Here is where to post and how to optimize for each platform.
YouTube (Long-Form)
Upload the full horizontal tour (1.5 to 3 minutes). Add an SEO-optimized title with the neighborhood, city, price, and property specs. Write a detailed description with the property address, features, and your contact information. Create a custom thumbnail with the property's hero shot and the price. This video will rank in YouTube and Google search for months.
Instagram Reels (Short-Form)
Cut the tour down to 15 to 30 seconds. Show only the 4 to 6 best rooms. Use the vertical crop. Add a trending audio track or your licensed music. Add text overlays with the address and price. Use location tags and neighborhood hashtags. Post at peak engagement times (check your Insights).
TikTok (Short-Form)
Same vertical edit as Instagram, but TikTok's algorithm favors different hooks. Start with the most visually striking room (not the exterior). Add a text hook: "This $500K home has the best kitchen I have ever listed." Trending sounds can boost distribution significantly.
MLS (Required Viewing)
Upload the horizontal version to YouTube first, then embed the YouTube link in your MLS listing. Most MLS systems accept YouTube links directly. Some accept direct MP4 upload. Check your local MLS rules for branding requirements. Many boards require the video on the listing to be unbranded. Use your unbranded version for MLS and the branded version everywhere else.
Facebook (Community Reach)
Upload natively to Facebook (do not share the YouTube link). Facebook deprioritizes external links in the algorithm. Post to your personal profile, your business page, and relevant local community groups. Add the property address and a call to action in the caption.
The $0 Kit vs. The $150 Kit vs. The $0 AI Workflow
Let me lay out three realistic approaches based on budget and time.
The $0 Kit: Phone Only
Your phone. Your hands. Natural light. Free editing app (CapCut or iMovie). This gets you a watchable property tour if you follow the techniques in this guide. Time per listing: 20 to 30 minutes (filming + editing). Quality: decent. Good enough for social media and MLS.
The $150 Kit: Phone + Accessories
Your phone. A gimbal ($100). A wireless mic ($30 if you narrate). A lens cloth ($2). Free editing app. This gets you smooth, professional-looking tours that compete with mid-range videography. Time per listing: 15 to 25 minutes (filming + editing). Quality: high. Good enough for all platforms including luxury property marketing.
The AI Workflow: Photos to Video
Your professional listing photos. An AI video tool ($59 to $129/month). This gets you cinematic video with depth-aware camera motion, beat-synced music, branded contact card, and four output format variants. Time per listing: 3 to 5 minutes. Quality: high, with professional source material. No filming or editing skills required.
Most agents I talk to start with the $0 kit, realize they enjoy the process (or do not), and either invest in the $150 kit or switch to the AI workflow. Both endpoints are valid. The $150 kit is for agents who enjoy filming and want that authentic walkthrough footage. The AI workflow is for agents who want the best output quality for the least time investment.
Your First Property Tour: A Homework Assignment
You have read 3,000 words about phone video technique. Time to use it. Here is your assignment, and I am giving you exactly one hour to complete it.
- Pick a property (5 minutes): Your current listing, your own home, or a friend's house. It does not matter. This is practice.
- Set up your phone (2 minutes): 4K 30fps, exposure lock, grid lines, airplane mode, clean lens.
- Prep the property (5 minutes): All lights on, blinds open, toilet lids down, personal items moved.
- Film the tour (3 to 5 minutes): Follow the room-by-room plan above. Walk slowly. Pause at doorways. Do not talk unless you have something useful to say.
- Edit (10 minutes): Trim, add music, add text overlays, export.
- Post (2 minutes): Upload to Instagram Reels with a location tag.
Total time: about 30 minutes. And just like that, you have your first property tour video. It will not be perfect. The second one will be better. The fifth one will be good. The tenth one will be great. But you will never get to the tenth one if you do not start with the first.
Or, if you want to skip straight to professional results: upload your listing photos to Reel-E and have a polished, branded listing video in under 5 minutes. Either way, the point is the same. Stop thinking about making video. Start making video. Your listings deserve it, and your marketing results will prove it.