You spent money on listing photos. You created a beautiful listing video. You are feeling good about your marketing. And then you try to upload it to Zillow and get a cryptic error message that says "File format not supported." Or you upload it to MLS and the video looks like it was filmed through a wet paper towel. Or you paste your YouTube link into Realtor.com and nothing happens.
I have heard some version of this story from hundreds of agents. The video creation part is actually the easy part in 2026. AI tools can turn your listing photos into cinematic video in under two minutes. The surprisingly hard part is getting that video onto the platforms where buyers actually look for homes. Every portal has different specs, different upload methods, different file size limits, and different rules about branding. None of them explain their requirements clearly. And when something goes wrong, the error messages are about as helpful as a fortune cookie.
This guide is the reference I wish existed when I started helping agents distribute their videos. Step-by-step upload instructions for every major platform, exact technical specs, troubleshooting for every common failure, and best practices for maximizing video visibility once it is live. Bookmark this page. You are going to need it more than once.
Before You Upload: The Universal Checklist
Before we get into platform-specific instructions, here are the baseline requirements that apply everywhere. Get these right and 90% of upload issues disappear.
Video File Requirements (All Platforms)
| Spec | Requirement | Why It Matters |
|---|---|---|
| Format | MP4 (H.264 codec) | Universal compatibility. Every platform accepts this. |
| Resolution | 1920x1080 minimum (1080p) | Below this, platforms compress it into blur. |
| Aspect ratio | 16:9 (horizontal) | All property portals use horizontal video players. |
| Bitrate | 8 to 15 Mbps | Higher = better quality after platform re-encoding. |
| Frame rate | 24 or 30 fps | 60fps is accepted but adds file size without visible benefit. |
| File size | Under 100 MB (safe for all platforms) | Some platforms allow more, but 100 MB works everywhere. |
| Duration | 30 seconds to 3 minutes | Under 30s feels incomplete. Over 3 min loses viewers. |
| Audio | AAC codec, 128 to 256 kbps | Background music is recommended. Avoid dead silence. |
If your video meets all of these specs, it will upload successfully to every platform covered in this guide. The most common upload failures come from wrong format (MOV instead of MP4), oversized files (4K at high bitrate), or non-standard codecs (H.265/HEVC, which some platforms do not support).
Branded vs. Unbranded: Which to Upload Where
This trips up more agents than any technical issue. Different platforms have different rules about branding in listing media.
| Platform | Branding Allowed? | Recommendation |
|---|---|---|
| MLS | Usually no (check your board) | Upload unbranded |
| Zillow | Yes | Upload branded (logo + contact card) |
| Realtor.com | Yes | Upload branded |
| Redfin | Via MLS syndication | Follows MLS rules (usually unbranded) |
| Homes.com | Yes | Upload branded |
| YouTube | Yes | Upload branded |
| Social media | Yes | Upload branded |
This is exactly why having both branded and unbranded versions of every video matters. You do not want to be manually editing out your contact card at 9 PM because you forgot the MLS does not allow it. Tools that generate both variants automatically, like Reel-E, solve this problem before it starts.
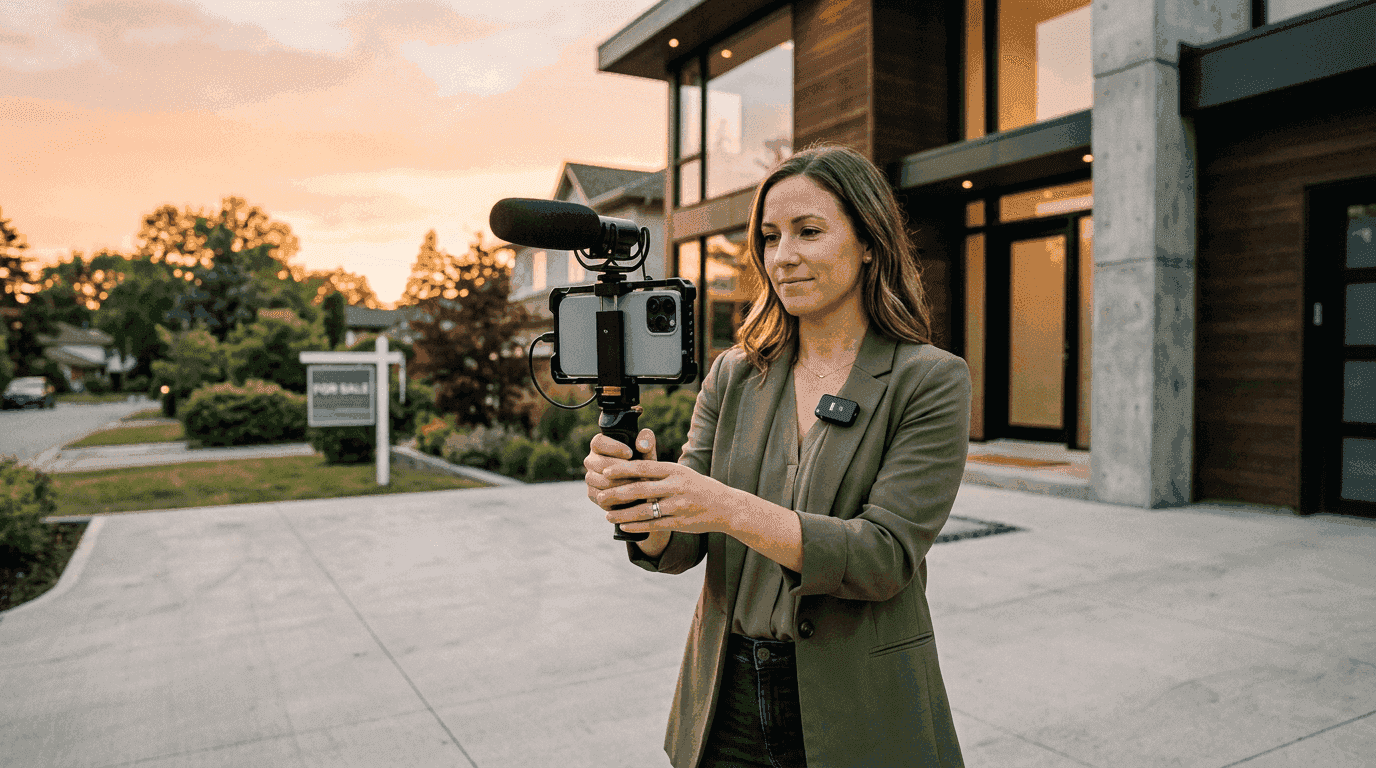
Here is what a properly produced, platform-ready listing video looks like:
How to Upload Video to Zillow (Step-by-Step)
Zillow is the 800-pound gorilla of real estate portals. Over 230 million monthly unique visitors. If your listing video is on Zillow, it is in front of the largest online homebuyer audience in the country. If it is not, you are missing the single biggest distribution channel available.
Method 1: Direct Upload (Recommended)
- Log in to your Zillow Agent Hub at
zillow.com/agent-hubor through your Premier Agent dashboard. - Navigate to your listing. Find the listing in your "My Listings" section. If the listing was syndicated from MLS, you may need to "claim" it first.
- Click "Edit Listing" and scroll to the media section.
- Select "Add Video" (or "Upload Video" depending on your dashboard version).
- Upload your MP4 file. Use the horizontal (16:9) branded variant. File must be under 250 MB.
- Add a video title. Use something descriptive: "Full Property Tour: 123 Oak Lane, Austin TX" works better than "listing video." Zillow indexes video titles for search.
- Wait for processing. Zillow re-encodes your video for their player. This takes 5 to 30 minutes depending on file size and server load. Do not panic if it is not immediately visible.
- Verify. View your live listing page and confirm the video appears in the media gallery. Check that it plays correctly and the quality is acceptable.
Method 2: YouTube Link Embed
- Upload your video to YouTube (see YouTube section below).
- Copy the YouTube URL (the full
youtube.com/watch?v=...link). - In your Zillow listing editor, paste the YouTube URL in the video field.
- Save. Zillow will embed the YouTube player on your listing page.
Which method is better? Direct upload gives you a cleaner viewing experience (no YouTube branding, no suggested videos afterward). YouTube embed gives you the SEO benefits of the video living on YouTube and the ability to track views and analytics through YouTube Studio. My recommendation: do both. Upload directly to Zillow for the listing page experience, and separately upload to YouTube for the search and analytics benefits.
Zillow Video Specs Summary
| Spec | Requirement |
|---|---|
| Format | MP4 (H.264) |
| Resolution | 720p minimum, 1080p recommended |
| Aspect ratio | 16:9 |
| Max file size | 250 MB |
| Max duration | 10 minutes |
| Branding | Allowed |
| Alternative | YouTube or Vimeo link embed |

How to Upload Video to Your MLS
MLS is where the rubber meets the road for most agents. Your MLS listing syndicates to Zillow, Realtor.com, Redfin, Homes.com, and dozens of other portals. Getting the video right in MLS often means it automatically appears everywhere else. Which sounds convenient until you realize that getting it wrong in MLS means it is wrong everywhere else too.
The challenge with MLS is that there is no single "MLS." There are over 550 MLS systems in the United States, each with slightly different interfaces, media policies, and technical requirements. I cannot cover all 550, but I can give you the process for the major platforms and the universal principles that apply to all of them.
MLS Video Upload Methods (In Order of Prevalence)
Method A: YouTube/Vimeo Link (Most Common)
The majority of MLS systems do not accept direct video file uploads. Instead, they provide a field where you paste a YouTube or Vimeo link. The MLS then embeds or links to that video on your listing page.
- Upload your video to YouTube or Vimeo. Use the horizontal unbranded variant (most MLS boards prohibit agent branding in listing media).
- Set the video to "Unlisted" on YouTube (not "Private"). Unlisted means anyone with the link can watch, but it will not appear in YouTube search. This keeps your unbranded video from floating around YouTube without context.
- Copy the video URL.
- In your MLS listing editor, find the "Virtual Tour" or "Video URL" field. This is usually in the media or supplementary links section.
- Paste the URL and save.
- Verify. View the listing on your MLS site and confirm the video link works.
Method B: Direct File Upload (Growing Availability)
Newer MLS platforms (and recently updated ones) are adding direct video upload capabilities. If your MLS supports this:
- Navigate to your listing's media section in the MLS editor.
- Look for a "Video" tab separate from the photos section.
- Upload your MP4 file. Use the horizontal unbranded variant.
- Wait for processing. Some MLS systems process video in minutes, others take hours.
- Verify that the video appears correctly on the listing detail page.
Method C: Virtual Tour Field (Legacy Approach)
Older MLS systems do not have a dedicated video field. Instead, agents put their YouTube link in the "Virtual Tour URL" field, which was originally designed for Matterport-style 3D tours. This works, but the listing may display the video as a "virtual tour" rather than a "video tour," which can confuse buyers who expect an interactive 3D experience.
Common MLS Video Requirements
| Requirement | Typical MLS Policy | Notes |
|---|---|---|
| Format | YouTube/Vimeo link or MP4 | Check your specific MLS |
| Branding | Usually prohibited | No agent names, logos, or contact info |
| Fair housing | Required compliance | No discriminatory language or imagery |
| Content | Must show the actual property | No market updates or agent promotion |
| Duration | Under 5 minutes | Some boards cap at 3 minutes |
| File size | 100 to 500 MB (for direct upload) | Varies widely by MLS |
| Resolution | 720p minimum, 1080p preferred | 4K accepted but not required |
For a comprehensive breakdown of video requirements across specific MLS systems (including Bright MLS, CRMLS, Stellar MLS, NWMLS, and more), see our dedicated MLS video requirements guide.
How to Upload Video to Realtor.com
Realtor.com is the second-largest real estate portal, operated by Move, Inc. (a subsidiary of News Corp). It receives over 100 million monthly visitors and has invested heavily in video and 3D tour features in recent years. If your listing is on Realtor.com without video, you are waving at buyers with one arm tied behind your back.
Step-by-Step Upload
- Log in to your Realtor.com dashboard at
dashboard.realtor.com. - Navigate to "My Listings" and select the listing you want to add video to.
- Click "Media" or "Tours & Videos" in the listing management section.
- Select "Add Video Tour."
- Choose your upload method: direct MP4 upload or YouTube/Vimeo URL.
- For direct upload: Select your horizontal branded MP4 file (branded is allowed on Realtor.com). Maximum 500 MB, maximum 10 minutes.
- For URL embed: Paste your YouTube or Vimeo link.
- Add a descriptive title for the video.
- Save and verify. Check the live listing page to confirm the video displays correctly.
One thing that catches agents off guard: Realtor.com pulls most listing data from MLS syndication. If your MLS listing already has a video link, it may appear on Realtor.com automatically. Adding a video directly through the Realtor.com dashboard gives you more control over presentation but may create duplicates if MLS syndication also brings in a video. Check both the syndicated and directly uploaded content to avoid showing the same video twice.
Realtor.com Video Specs Summary
| Spec | Requirement |
|---|---|
| Format | MP4 (H.264) |
| Resolution | 720p minimum, 1080p+ recommended |
| Aspect ratio | 16:9 |
| Max file size | 500 MB |
| Max duration | 10 minutes |
| Branding | Allowed |
| Alternative | YouTube or Vimeo link embed |
How to Get Video on Redfin
Redfin is the one platform on this list where you cannot upload video directly. There is no "add video" button on Redfin. The only way to get your listing video onto Redfin is through MLS syndication. (I know. I did not design it. I just have to tell you about it.)
How It Works
- Add your video to your MLS listing using either the YouTube link method or direct file upload (whichever your MLS supports).
- Wait for syndication. Redfin syncs with MLS data multiple times per day. Your video should appear on the Redfin listing within 2 to 24 hours.
- Verify on Redfin. Search for your listing on Redfin.com and check that the video appears in the media section.
Troubleshooting Redfin Video
- Video does not appear after 24 hours: Confirm your MLS listing actually contains the video link. Some MLS systems have a separate "syndication" toggle for media that may not be enabled by default.
- Video link is broken on Redfin: If you used a YouTube link and later deleted the YouTube video, the Redfin listing will show a dead link. Keep your YouTube videos live for as long as the listing is active.
- Video appears but is wrong format: Redfin displays video in a 16:9 player. If your YouTube video is vertical (9:16), it will display with black bars. Always use horizontal video for MLS syndication.
How to Upload Video to Homes.com
Homes.com (owned by CoStar Group, which also owns LoopNet and Apartments.com) has been aggressively investing in its platform and now competes directly with Zillow and Realtor.com for buyer traffic. Its user base has grown significantly since CoStar's acquisition, making it a platform you should not ignore.
Step-by-Step Upload
- Log in to your Homes.com agent dashboard.
- Navigate to your listing page.
- Click "Edit" and go to the media section.
- Add your video via direct MP4 upload or YouTube link.
- Save and verify.
Homes.com also syndicates from MLS, so if your MLS listing includes video, it may already be there. Verify before uploading a duplicate.
How to Upload to YouTube (For Syndication and SEO)
YouTube is not a real estate platform, but it is the second-largest search engine in the world and the backbone of video distribution for many agents. Every other platform on this list accepts YouTube links, making it the hub of your video distribution strategy.
Step-by-Step Upload
- Go to YouTube Studio (
studio.youtube.com) and click "Upload." - Upload your MP4 file. For your branded channel content, use the horizontal branded variant. For MLS use, upload a separate horizontal unbranded version set to "Unlisted."
- Title: Use a keyword-rich title. "4 Bed 3 Bath Home Tour | 123 Oak Lane, Austin TX | $549,000" is far better than "New Listing Video."
- Description: Include the full property address, key features, your contact information, and a link to the full listing. YouTube's algorithm reads descriptions for search ranking.
- Tags: Add location-specific tags: "Austin real estate," "Austin homes for sale," "78745 homes," plus the neighborhood name and property type.
- Custom thumbnail: Upload the best frame from your video. Do not let YouTube auto-select. A great thumbnail can double your click-through rate.
- Publish (or set to "Unlisted" if this is for MLS link use only).
YouTube SEO Tips for Listing Videos
- Include the full address in the title. Buyers search for specific addresses on Google and YouTube. If your video title matches, you appear in results.
- Add chapters/timestamps. "0:00 Exterior, 0:15 Living Room, 0:30 Kitchen, 0:45 Primary Suite" helps viewers navigate and improves YouTube's understanding of your content.
- Pin a comment with the listing link, price, and your phone number. The pinned comment appears at the top of the comments section and catches the eye of interested viewers.
- Add an end screen linking to your channel's other listing videos. Keep viewers on your content, not someone else's.
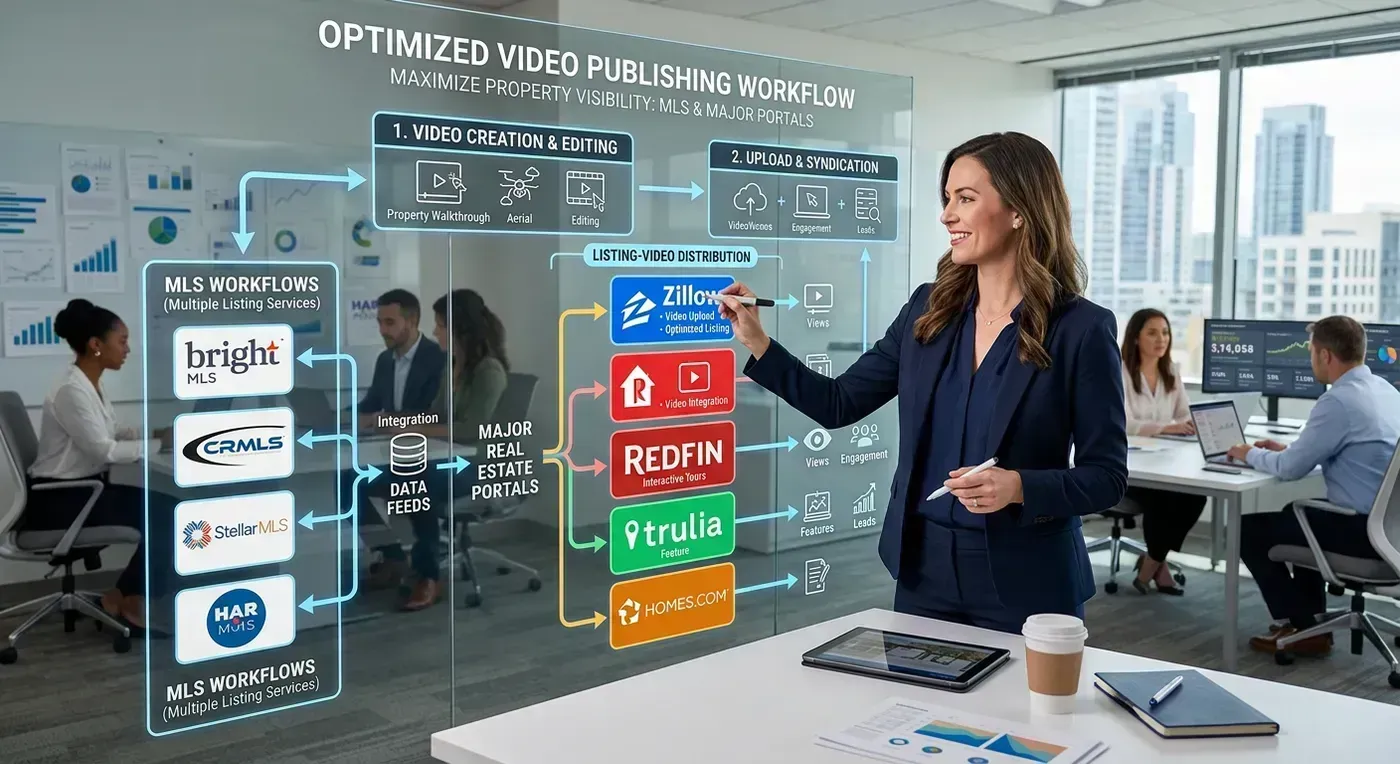
The Distribution Workflow: Putting It All Together
Here is the complete workflow for distributing a single listing video across all major platforms. It sounds like a lot of steps, but once you have done it twice, the whole process takes about 15 to 20 minutes.
Complete Distribution Checklist
- Create your listing video using your preferred tool. If using Reel-E, you will get four variants automatically: horizontal branded, horizontal unbranded, vertical branded, vertical unbranded.
- Upload horizontal branded to YouTube (Public, with full SEO optimization).
- Upload horizontal unbranded to YouTube (Unlisted, for MLS link use).
- Add the Unlisted YouTube URL to your MLS listing in the video/virtual tour field.
- Upload horizontal branded directly to Zillow.
- Upload horizontal branded directly to Realtor.com (or verify MLS syndication brought it in).
- Verify video appears on Redfin via MLS syndication (24-hour check).
- Verify video appears on Homes.com via syndication or upload directly.
- Post vertical branded to Instagram Reels.
- Post vertical branded to TikTok.
- Post vertical branded to YouTube Shorts.
- Email horizontal branded to seller so they can share with their network.
- Add horizontal branded to your website's listing page.
Thirteen distribution points from one set of listing photos. Total active time (after the video is created): about 20 minutes. Total reach: the entire online homebuyer ecosystem. That is the difference between a listing video that sits on one platform collecting dust and a listing video that works as hard as you do.
For social media platform specs, aspect ratios, and format requirements beyond the property portals covered here, see our comprehensive social media video specs guide.
Troubleshooting Common Upload Issues
When uploads fail, the error messages are rarely helpful. Here are the actual causes and fixes for the most common issues agents encounter.
Problem: "File Format Not Supported"
Cause: Your file is MOV (Apple QuickTime) instead of MP4, or it uses the H.265/HEVC codec instead of H.264. Some newer phones and cameras default to HEVC because it produces smaller files, but not all platforms support it yet.
Fix: Convert to MP4 H.264 using HandBrake (free, available at handbrake.fr). Open your video, set the output to MP4, video codec to H.264, and click "Start." It takes a minute or two. Or, if you are using an AI video tool, the output is already MP4 H.264. Problem solved before it starts.
Problem: "File Too Large"
Cause: Your video exceeds the platform's file size limit, usually because it is 4K resolution at a high bitrate or an unusually long video.
Fix: Reduce the bitrate, not the resolution. In HandBrake, set the average bitrate to 8 to 10 Mbps instead of the default (which can be 20+ Mbps for 4K). This typically cuts file size by 50% to 70% with minimal visible quality loss. Alternatively, trim the video to a shorter duration. A 60-second 1080p video at 10 Mbps is approximately 75 MB, well within all platform limits.
Problem: Video Looks Blurry After Upload
Cause: Double compression. Your source video was already compressed (low bitrate), and the platform re-compressed it during processing. Two rounds of compression destroy fine detail.
Fix: Always upload the highest quality source file you have. If you are downloading a video from one platform and re-uploading to another (do not do this), the quality degrades with each download/upload cycle. Always upload from your original render file. If using AI video tools, download the original MP4 directly from the tool, not from a social media platform where you previously posted it.
Problem: Video Shows Black Bars
Cause: Aspect ratio mismatch. You uploaded a vertical (9:16) video to a platform with a horizontal (16:9) player, or vice versa.
Fix: Use the correct variant for each platform. 16:9 horizontal for MLS, Zillow, Realtor.com, Redfin, YouTube long-form. 9:16 vertical for Instagram Reels, TikTok, YouTube Shorts. Never try to make one format work for all platforms. It does not.
Problem: Video Uploaded But Does Not Appear on Listing
Cause: Processing delay. Most platforms re-encode uploaded videos, which takes time. Alternatively, the upload completed but the listing page is cached and showing the old version.
Fix: Wait 30 minutes to 1 hour for processing. Clear your browser cache and reload the listing page. If the video still does not appear after 2 hours, contact the platform's support. For MLS syndication delays (especially to Redfin), wait 24 hours before troubleshooting.
Best Practices for Maximum Visibility
Getting the video uploaded is step one. Making sure it actually gets seen is step two. Here are the practices that maximize video visibility on each platform.
Zillow
- Upload video within 24 hours of listing going live. Zillow's algorithm boosts new listings in search results. Having video ready from day one means maximum exposure during the highest-traffic period.
- Use a descriptive title. "Complete Home Tour" beats "listing_video_final_v2."
- Make the video the first media item. If your MLS feed puts photos first, manually reorder so the video leads. Some agents report 40% more plays when video is the first media item viewers see.
MLS
- Add the video before the listing goes active. Once the listing goes active, syndication begins. If the video is not attached yet, the first syndication cycle sends a video-less listing to all portals. Adding video later requires waiting for the next sync cycle.
- Use the "video" field, not just "virtual tour." If your MLS has separate fields for virtual tour and video tour, use both. Put your Matterport or 3D tour in the virtual tour field and your video in the video field. Buyers search for both, and having both signals a thoroughly marketed listing.
- Set the correct media type. Some MLS systems ask you to categorize the media type (video tour, virtual tour, slideshow). Select "video tour" for the most accurate representation. Mislabeling can confuse buyers who expect one thing and get another.
YouTube
- Publish listing videos on a consistent schedule. YouTube rewards consistent uploaders. If you publish a listing video every Tuesday, the algorithm learns to promote your content to viewers who watch real estate videos.
- Create playlists by neighborhood. "Austin - Westlake Homes" and "Austin - East Side Homes" playlists help buyers binge your content and boost your channel's watch time.
- Respond to every comment. YouTube promotes videos with active comment sections. Even a simple reply like "Thanks! DM me if you want to schedule a showing" adds engagement signals.
The Complete Platform Specs Reference Table
Bookmark this table. It is every spec you need, in one place.
| Platform | Upload Method | Format | Max Size | Max Duration | Aspect Ratio | Branding |
|---|---|---|---|---|---|---|
| Zillow | Direct or YouTube link | MP4 H.264 | 250 MB | 10 min | 16:9 | Allowed |
| Realtor.com | Direct or YouTube link | MP4 H.264 | 500 MB | 10 min | 16:9 | Allowed |
| Redfin | MLS syndication only | Via MLS | Via MLS | Via MLS | 16:9 | Per MLS rules |
| Homes.com | Direct or YouTube link | MP4 H.264 | 500 MB | 10 min | 16:9 | Allowed |
| Most MLS | YouTube link or direct | MP4 H.264 | 100-500 MB | 5 min | 16:9 | Usually no |
| YouTube | Direct upload | MP4 H.264 | 256 GB | 12 hrs | 16:9 | Allowed |
| Instagram Reels | App upload | MP4 H.264 | 4 GB | 90 sec | 9:16 | Allowed |
| TikTok | App upload | MP4 H.264 | 4 GB | 10 min | 9:16 | Allowed |
| YouTube Shorts | Direct upload | MP4 H.264 | 256 GB | 60 sec | 9:16 | Allowed |
Creating Platform-Ready Videos Without the Headache
If reading this guide made you think "this is a lot of formats to manage," you are right. The platform fragmentation is the single biggest barrier to consistent video distribution in real estate. You need horizontal branded, horizontal unbranded, vertical branded, and vertical unbranded versions. You need them in 1080p at the right bitrate. You need them as MP4 H.264. And you need them for every single listing.
This is the problem I set out to solve when I built Reel-E. Upload your listing photos, pick a music track, add your branding, and the system generates all four variants automatically. Every variant is already MP4 H.264, 1080p, under 100 MB, with correct aspect ratios. You download, distribute, done. No format conversion, no resolution math, no "oops I uploaded the branded version to MLS." For more on how the AI processing works under the hood, see our How Reel-E Works deep-dive.
But regardless of what tool you use to create your videos, the distribution workflow in this guide stays the same. The platforms do not care how your video was made. They care that it meets their specs and shows up on the listing page looking clean and professional.
Ready to create platform-ready listing videos from your photos? Start a free trial and see how the whole workflow works with your actual listing photos. Two minutes from photos to four distribution-ready video variants.