Skip to content

Tutorials

Get up to speed in 4 short videos

From signup to your first listing, these short videos walk you through Reel-E. Each one has written steps you can scan later. To edit your video, follow the written Keylight Studio guide below.

Sign in to track your progress as you watch.

Written guide

Edit your video in Keylight Studio

Keylight is where you edit your video, photos, captions, voiceover and branding. It opens on your video with your shots beside it. Here is every feature, step by step. In the Keylight, open Help to take any of these as a guided walkthrough.

Walkthrough

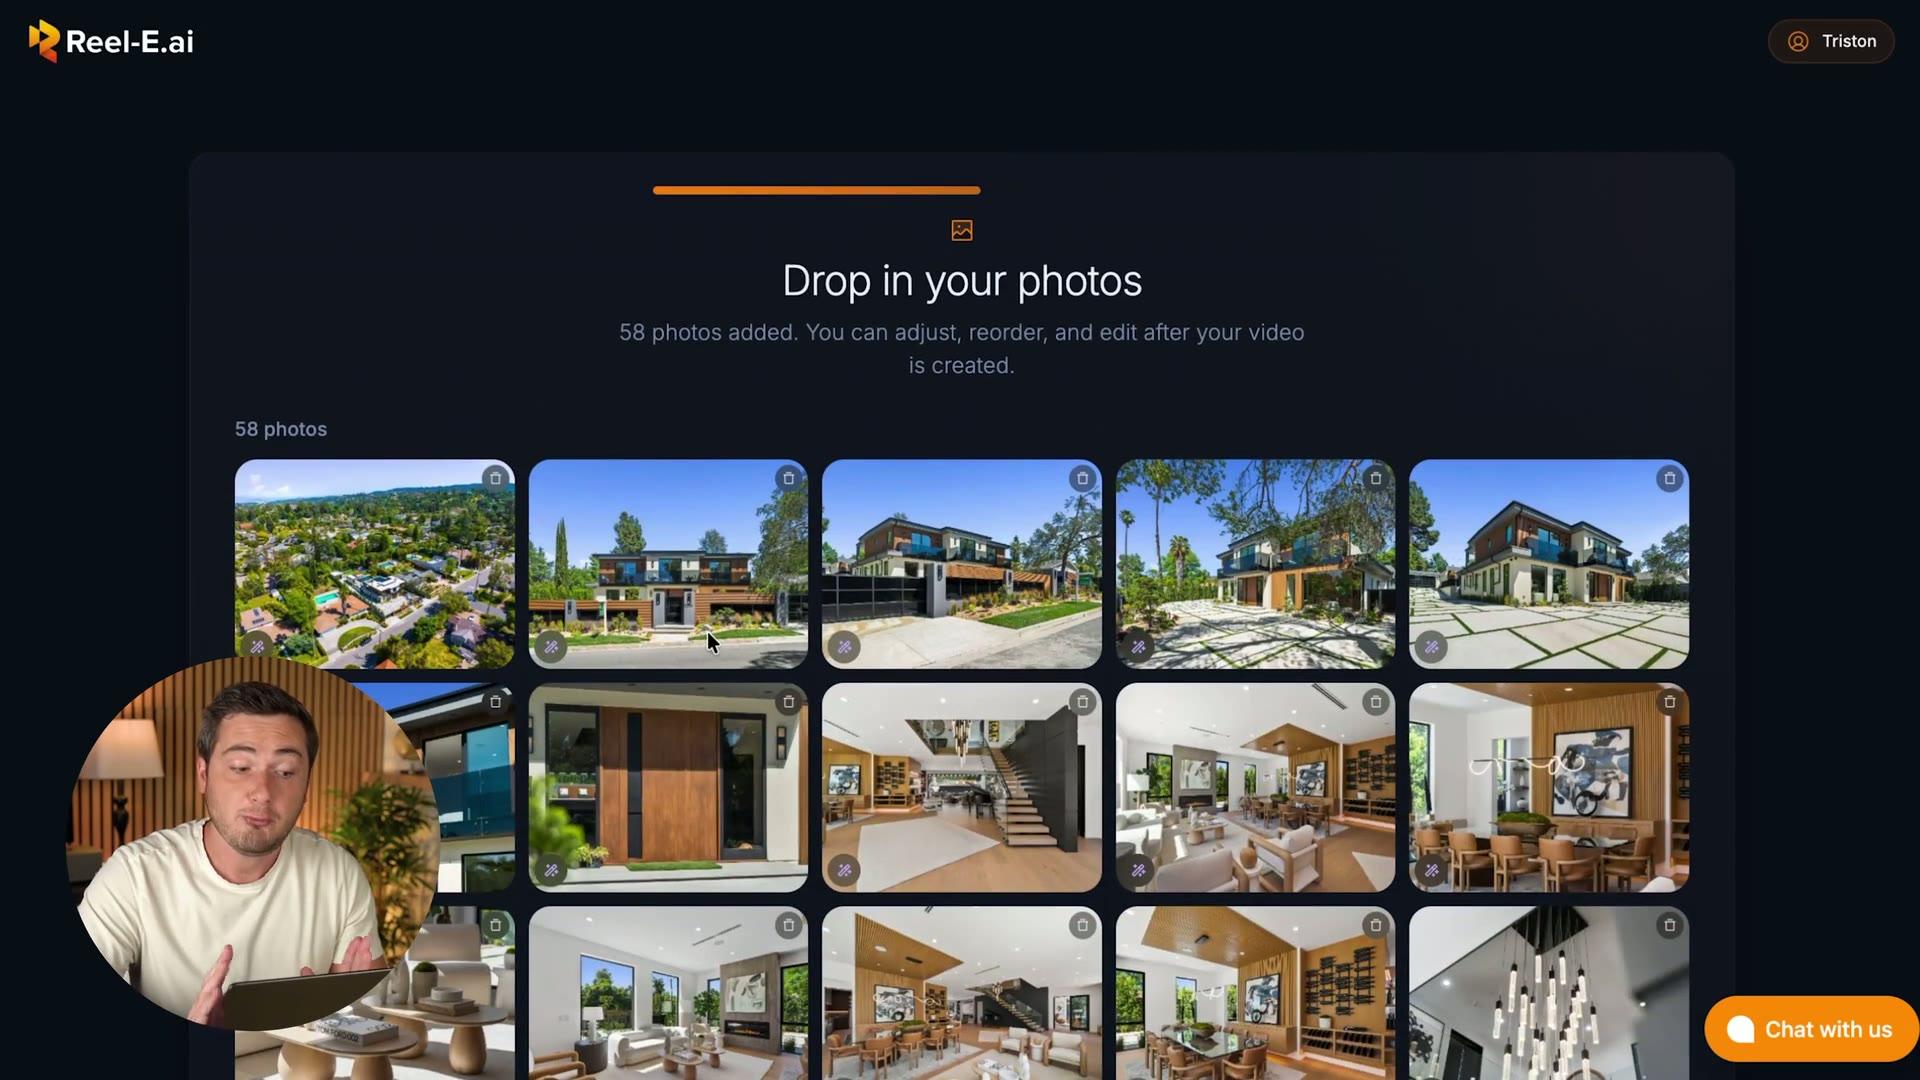
Your shots

Add photos, choose what is in the video, reorder and remove.

  1. Every photo, in play order. Numbered shots are in your video. Unused, at the top, holds the photos waiting on the side.
  2. Add photos. Choose Add photos, or drop photos onto Shots. Keep editing while they upload.
  3. Add to video?. When a new photo is ready, choose Add to video to put it in, or leave it for later.
  4. Unused. Switch to Unused and tap a photo to put it in. Tap a numbered shot to take it out.
  5. Change the order. Drag a shot to its new place. On a phone, press and hold first.
  6. Remove a photo for good. Tap Edit on a shot, then Delete from this listing. Taking it out of the video keeps it.

Walkthrough

Transitions and movement

Cut, Fade, Ramp or AI between shots, and each shot's movement, length and AI+.

  1. Between two shots. Each chip is the transition into the next shot: Cut, Fade, Ramp or AI. Tap one to change it.
  2. AI Seamless. Choose AI on a chip for one continuous move into the next shot. It uses 1 AI+ credit.
  3. Open a shot. Tap Edit on a shot for its movement and length.
  4. Movement. Pick Push In, Pull Out, Orbit Left or Orbit Right. The preview plays it right away.
  5. Length. Choose Shorter, Normal or Longer for this shot. The first and last shots keep their length.
  6. AI+. Turn a photo into real motion. It uses 1 AI+ credit and takes a few minutes.

Walkthrough

Photo editing

Enhance, virtual staging, Match photo, your own instructions, versions and the original.

  1. Open a photo. Tap Edit on a shot to open it.
  2. Switch to Photo. Video is the shot's movement. Photo holds the photo tools.
  3. Enhance in one tap. Under Edit, pick a suggestion like Make it Pro or Make it Twilight, then Apply.
  4. Say what you want. Describe the edit in your own words, like Remove the car, then Apply edit.
  5. Virtual staging. Under Staging, pick a style to furnish an empty room. It uses a photo edit credit.
  6. Match photo. In Staging, choose Match photo to furnish this room like another staged photo.
  7. Same room from another angle. Turn this on when the other photo shows the same room, so the furniture matches too.
  8. Versions and undo. Every edit is saved as a version under History. Step back to any of them.
  9. Your original is safe. Use original brings the photo back as you uploaded it, whatever you tried.

Walkthrough

Music

Browse and hear songs, use one with Undo, save favorites and upload your own.

  1. Open Music. Every Royalty-free song here is licensed for your listing videos.
  2. Find a song. Search by name, or choose Show all songs. Press play on a song to hear it.
  3. Use a song. Tap a song and it plays in your video right away. Undo brings the old one back.
  4. Save to My music. Save only adds a song to My music, ready for your next listing.
  5. My music. Your saved and uploaded songs live here, for every project.
  6. Upload your own. Add your own track: up to 20 MB, between 10 seconds and 6 minutes long.

Walkthrough

Text

The opening title, your own text on a shot, stickers like Open house, and how to change or remove them.

  1. Open Text. Titles and your own words live here.
  2. Opening title. Show the address at the start of your video, and pick its style.
  3. Manual text. Choose Manual text to put your own words over a shot, like Open house Saturday.
  4. Change or remove it. Type to change the words, or remove the text. On a computer, drag it on the timeline to time it.
  5. Stickers. Choose Stickers, then Add sticker for a badge like Just listed or Open house. It sits on top of your text.
  6. Edit, time or remove a sticker. Open house, Price reduced and Available now take your own line. Timing sets when it shows. Delete sticker removes it.

Walkthrough

Branding

Your logo, Headshot and contact card, and where they show in the video.

  1. Open Branding. Your brand shows at the end of every video.
  2. Contact card. Turn on Contact card at the end, then add your name, phone, email and brokerage.
  3. Headshot. Choose Upload headshot to add your Headshot. Style and Background change the card's look.
  4. Logo card. Under Logo, turn on Logo at the end to show your logo right after the contact card.
  5. See it in your video. Press play and watch the end. Your branding shows here before you make the video.

Walkthrough

Voiceover

Write or generate a script, pick a voice, make the narration, preview, redo or remove.

  1. Open Voiceover. Add narration that plays over your music.
  2. AI voice or your own. Choose AI voice to have Keylight read it, or Record my own.
  3. Your script. Choose Auto-generate voiceover to write it from your video, or add sections and type your own.
  4. Pick a voice. Choose the voice that reads your script, and preview it first.
  5. Hear it over your video. Press play to hear the narration with your music turned down.
  6. Redo or record again. Change any words and make a new take, or record your own voice instead.
  7. Turn it off. Switch the voiceover off to go back to music only. Your script stays saved.

Walkthrough

Download and share

Download every shape, share a link, post it to MLS and your listing website.

  1. Your latest changes. A dot on Download and Share means your latest changes aren't in the video yet. What you download or link includes them.
  2. Download. Pick Widescreen, Square or Phone, or all of them. A ready shape downloads at once; others say how long.
  3. Share. In Share, copy a video link or an MLS link, or get an embed.
  4. Your listing website. In Share, choose Website to put this video on your listing website.
  5. Remove the watermark. On a free trial your video has a watermark. Remove watermark starts your plan and makes it clean.

Quick answers

Start

  • Watch your video

    1. Press play under the video.
    2. Every change you make shows up in the preview right away.
    3. On a computer, press Space to play or pause.
  • Undo a change or go back to an earlier version

    1. Press Undo at the top, or Cmd+Z (Ctrl+Z on Windows).
    2. Press Redo to bring the change back.
    3. Open More, then Version history, to play or return to an earlier version.

Shots

  • Change the order of your shots

    1. Choose Shots in the tool bar.
    2. Drag a shot to its new place. The numbers show the play order.
    3. On a phone, press and hold a shot, then drag it.
  • Put a photo in the video or take it out

    1. Choose Shots in the tool bar.
    2. Tap a numbered shot to take it out of the video. It stays in your photos, under Unused.
    3. Switch to Unused at the top of Shots, then tap a photo to put it back in.
  • Add new photos

    1. Choose Shots, then Add photos. You can also drop photos onto Shots.
    2. New photos upload first. Keep editing while they do.
    3. When a photo is ready, choose Add to video, or tap the photo.
  • Change a shot's movement or length

    1. Tap Edit on a shot.
    2. Under Movement, pick how the camera moves across the photo.
    3. Under Length, choose Shorter, Normal or Longer. The first and last shots keep their length.
  • Change a transition

    1. Find the chip between two shots. It says Cut, Fade, Ramp or AI.
    2. Tap it and pick a new transition.
    3. The preview plays the change right away.
  • Enhance, stage or crop a photo

    1. Tap Edit on a shot, then switch from Video to Photo.
    2. Under Edit, pick a suggestion or describe your own edit. Under Staging, pick a style.
    3. Staging and AI photo edits use photo edit credits. Crop does not.
  • Stage a room to match another photo

    1. Tap Edit on a shot, switch to Photo, then choose Staging.
    2. Choose Match photo and pick the staged photo to copy.
    3. If both photos show the same room from another angle, turn that on so the furniture matches.
  • Undo a photo edit or go back to the original

    1. Tap Edit on a shot, switch to Photo, then choose History.
    2. Every edit is a version. Pick any version to use it again.
    3. Choose Use original to bring back the photo as you uploaded it. The original is always safe.

Style

  • Change the music

    1. Choose Music in the tool bar.
    2. Press play on a song to hear it.
    3. Choose a song to use it. It plays in your video right away, and Undo brings the old one back.
    4. While AI+ is working on a shot, Music says why the song has to wait.
  • Save a song or upload your own

    1. Choose Music in the tool bar.
    2. Save a song to My music to use it again on your next listing.
    3. Upload your own track: MP3, WAV, M4A, AAC, FLAC or OGG, up to 20 MB, 10 seconds to 6 minutes.
  • Add a title or your own text

    1. Choose Text in the tool bar.
    2. Turn on the Opening title to show the address, or choose Manual text for your own words.
    3. Choose Stickers for a badge like Just listed or Open house.
    4. On a computer, drag text or a sticker on the timeline to set when it shows.
  • Add a voiceover

    1. Choose Voiceover in the tool bar.
    2. Choose AI voice and Auto-generate voiceover, or Record my own.
    3. Change any words, then press play to hear it over your video.
  • Add your contact card, Headshot and logo

    1. Choose Branding in the tool bar.
    2. Under Contact card, turn on Contact card at the end and add your name, phone and email.
    3. Choose Upload headshot for your Headshot. Under Logo, turn on Logo at the end for your logo.

AI+

  • Bring a photo to life with AI+

    1. Tap Edit on a shot.
    2. Under Movement, choose AI+. It uses 1 AI+ credit.
    3. It takes a few minutes. Keep editing while it works.
    4. See how many AI+ credits you have left in More.
  • Join two shots with AI Seamless

    1. Tap the chip between two shots and choose AI.
    2. Keylight makes one continuous move from one shot into the next. It uses 1 AI+ credit.
    3. Still waiting after about 3 minutes? Choose Use Dissolve instead.

Finish

  • Download your video

    1. Your changes save as you go.
    2. Press Download at the top right and pick a shape: Widescreen, Square or Phone.
    3. A dot on Download means your latest changes are not in the video yet. The shape you pick makes the updated video first, then downloads it.
  • Share your video or listing website

    1. Press Share at the top right.
    2. Copy a link to your video, or put it on your listing website.
    3. Send the link anywhere: email, text or social.
  • Remove the trial watermark

    1. Press Remove watermark at the top. On a phone, it is the first item in More.
    2. Confirm to end your free trial and start your plan.
    3. Your video is made again without the watermark.